
Just for a reminder of how far I came with this little tiny 5'x5' pantry, here is what it looked like 3 weeks ago...mmm, so pretty, I know. Who would want to change this, right?

First I spent a few hours of sanding then scrubbing layers of grime and old pantry smell off with TSP. Next, two coats of primer inside the pantry and all sides of the doors. Then three coats of Valspar "Bisro White" on both sides of the door.

Pantry wall got two coats of fab Martha Steward "school house slate" gray

And finally, we have food in our pantry!!! Yay!!
I hope you remember what the previous "pantry" was before this was finally utilized. If not, that's fine, just keep this in your memory...it's much prettier.

First, the pantry door. I seriously HEART the shelving on this door! And to think I actually thought of tearing it out at one point! Good thing I came to my senses because it's perfect for the small, light pantry items that are good to keep in sight, but you don't want laying around all willy nilly every where. Once the kitchen cabinets are finished, the spices will not be in this door. They have their own little home right next to the stove, but for now they are renting space on the pantry door. McKenna is very excited because now she has her own special shelf on the bottom where she can reach her snacks like a "big girl".
 Of course I made a trip to IKEA for a few storage solutions. First I grabbed a couple of those black organizing boxes. Inside I put all the small "baking" stuff like sprinkles, cupcake papers, frosting, vanilla, baking power, baking soda, ect. We rarely bake so those things are better off tucked away out of site.
The smaller glass containers on the top shelf are from IKEA $3.99/pc. I put powdered sugar and brown sugar in those. I guess I could have tucked those away as well, but I wanted sugars and powders in glass containers so they weren't messy bags leaking everywhere. The larger glass canisters are from Wal-Mart {purchased today...haha} $7/pc. Those pretty things hold flour and sugar. Also rarely used in our house but necessary to have around.

Top shelf.
{I need another canister for the WW flour I guess}
Also, I'm getting my hands on some adhesive vinyl for the CRICUT and will be making vinyl labels for all the glass canisters! Thank you Shelley {from the house of Smith's blog} for that great idea!!
{sorry for the crooked picture}

If you are thinking 'holy crap, they don't have any food in their house' you would be correct! We are the shop-one-week-at-a-time-weekly-meal-planner family of 3 and I didn't go grocery shopping today! Score 2 points for a great domestic engineer, but hey, I got the pantry done-ish and the house cleaned!!!
The glass spaghetti canister is from IKEA $5 and the stainless steel container holds coffee which I rarely drink {at home} anymore, but need to keep some on hand in case of emergency. I've kinda got hooked on tea lately so I'm still getting my caffeine, don't you worry. I also picked up that little white stack able shelf rack on the right so I have a place to put bread without it getting squished. I hate having a bunch of stuff on the kitchen counter tops so the more in the pantry, the better. The basket on the lower left shelf holds open bags {pretzels, pirate booty, gold fish} nice and neat so they don't end up spread out and falling over all over the pantry shelves.

Small square glass container {$3} is for almonds {also always on hand} and the taller one {$4} is for Oatmeal. Both from IKEA. Don't you love how food looks in glass containers? Sooo much prettier! Now I just hope I don't forget how to make my oatmeal without the directions on the back of the container! =)

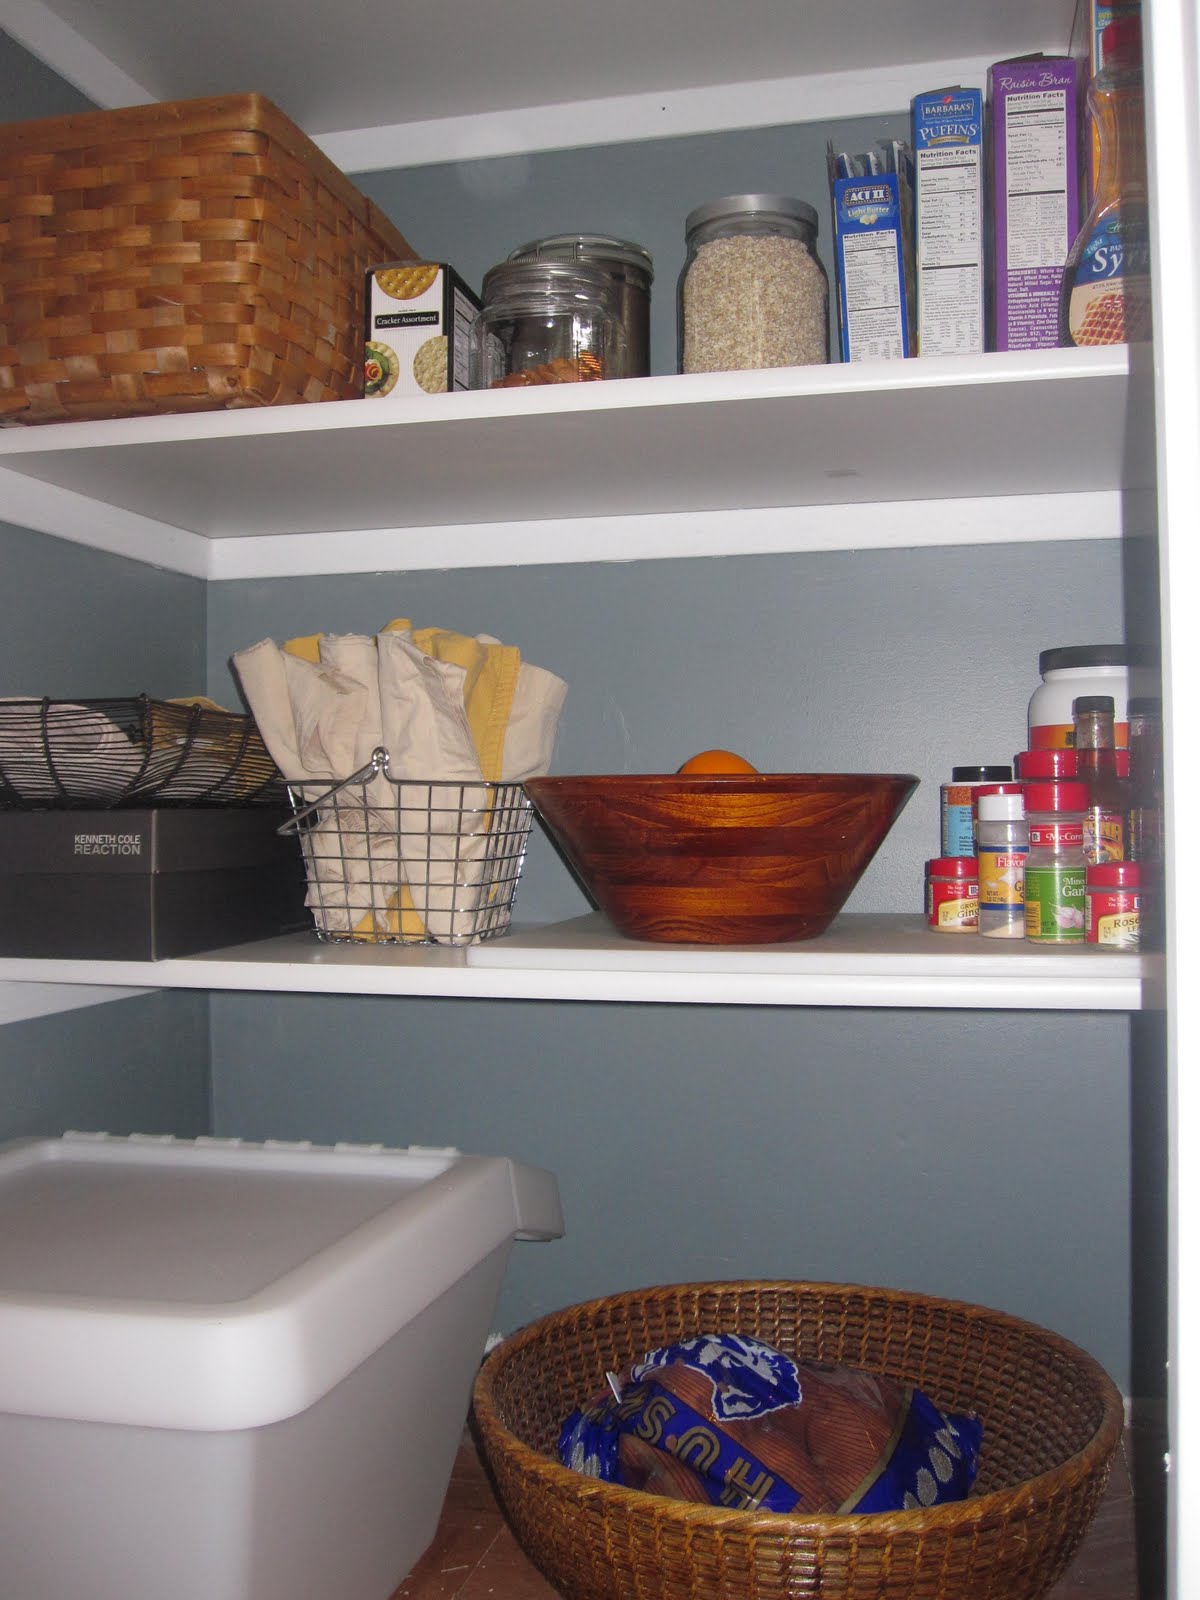
Recycle bin on the floor with potatoes and the can of wood putty I tried to hide behind that basket! Oh well, I need to work on my staging techniques...don't judge too harshly =)
So part of what is not finished, along with labeling all the pretty glass containers, is the baseboards/trim. We have to hold off on that because as you can see below the floors are old parquet floors and since we know it will be at least 2-3 years before we rip out and re-do the whole kitchen we are keeping these floors, but they will not look like this very long...


They will look similar to this {hopefully} after we are done with the kitchen remodel.

or this...

Ahhh, painted wood floors!
{Check out this gal for some awesome painted wood floor ideas}
I have ALWAYS wanted to paint wood floors, but who wants to do that when you have beautiful hardwoods already! Well, in this kitchen we don't!! So, my remedy for the ugly parquet floors that will be replaced in a couple years is to PAINT THEM!!! You have no idea how excited I am to tackle this project when it's warm enough to open up all the windows and the patio door. We'll also have to move in with my sister and her husband for a couple days {they don't know that part yet} while it dries.
So, there you have it. Almost complete pantry and a vision of what the ugly parquet floors will look like before the summer!
Have a great night!
xo Shelley
That turned out wonderful!
ReplyDeleteShelley! It turned out GREAT! I love the colors and the ideas of the jars. So many wonderful ideas! WAY TO GO!!! Can't wait to see the floors and what you do next. Thanks for sharing.
ReplyDeletePS-I wish I had those shelves on my door...let alone a real pantry!